
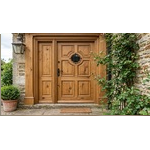
 Doors (External)
 Doors (Internal)
 Barns (External)
 Barns (Internal)
 Cabinets
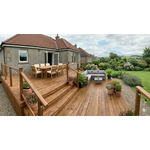 Decking
 Fences
 Floors
 Furniture
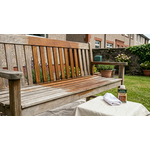 Garden Furniture
 Garden Paints
 Guitars & Musical Instruments
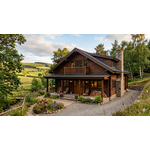 Log Cabins
 Sheds
 Sleepers
 Stairs
 Summer Houses
 Tables
 Toys (Wooden)
 Windows
 Woodturning
 Worktops
The importance of Sanding Grits.......

The Significance of Choosing the Right Sanding Grit Prior to Applying Wood Oils, Stains, and Paints
How Proper Timber Preparation Influences the Quality of Your Finish
When it comes to applying wood oil, stain, varnish, or paint, obtaining a professional and durable finish begins well before the initial coat is applied. One of the most frequently neglected yet essential steps in timber finishing is the selection of the appropriate sanding grit during surface preparation.
Selecting an incorrect grit can impact the penetration of wood oils, the absorption of stains, and the adhesion of paints to the timber surface. Even high-quality coatings may not perform as expected if the timber has not been adequately prepared.
In this guide, we will discuss the importance of sanding grit, how various grits influence timber coatings, and the optimal sanding techniques for achieving exceptional results.
What Is Sanding Grit?
Sanding grit refers to the size of the abrasive particles found on sandpaper. Lower grit numbers contain larger particles that remove material quickly, while higher grit numbers contain finer particles used for smoothing and finishing.
Common sanding grit ranges include:
| Grit Range | Purpose |
| 40–80 Grit | Heavy material removal and shaping |
| 80–120 Grit | Surface preparation and smoothing |
| 120–180 Grit | Final preparation before applying coatings |
| 220+ Grit | Fine finishing and sanding between coats |
Choosing the correct grit ensures the timber surface is properly prepared for optimal coating performance.
Why Properly Sanding Timber Is Crucial Before Applying Wood Oils Enhanced Oil Absorption Wood oils are formulated to deeply penetrate the timber, providing nourishment and protection from within. If the timber is sanded with overly fine sandpaper, the surface may become too polished, which can hinder the wood's ability to effectively absorb the oil. For most types of timber, a final sanding grit of 120 to 180 strikes the perfect balance between smoothness and absorption. Advantages include: Improved oil absorption Increased timber protection Better grain visibility More uniform color and finish Enhanced Performance and Durability When wood oil can adequately penetrate the surface, it establishes a more robust protective barrier against moisture, UV rays, and general weathering. This results in greater durability and extended maintenance intervals.
How Sanding Grit Affects Wood Stain Absorption
One of the most common causes of blotchy or uneven staining is incorrect sanding.
Timber that has been sanded too finely may resist stain absorption, resulting in inconsistent colour across the surface. Conversely, timber that has been sanded too coarsely may absorb excessive stain, creating dark patches and visible sanding scratches.
For most staining projects, professional finishers recommend a final sanding grit between 120 and 150 grit.
This preparation helps achieve:
- Uniform stain absorption
- Consistent colour tone
- Reduced blotching
- Improved appearance of the timber grain
The Optimal Sanding Grit Prior to Painting Timber
When getting timber ready for painting, the goal shifts slightly. In contrast to oils and stains, paint creates a film on the surface and necessitates sufficient adhesion to work properly. A well-sanded timber surface enables primers and paints to adhere firmly, which helps to avoid: -
Peeling –
Flaking –
Early paint failure –
Moisture penetration
For the majority of painting tasks, a final sanding grit ranging from 120 to 180 grit offers an excellent surface profile for the adhesion of primer and paint.
Common Sanding Mistakes to Avoid
Sanding Too Fine
Many people assume that smoother is always better. In reality, sanding timber beyond the manufacturer's recommended grit can reduce coating penetration and adhesion.
Skipping Grit Stages
Jumping from a coarse grit directly to a fine grit often leaves scratches that become highly visible once the finish is applied.
Instead, progress through the grit sequence gradually for a more consistent result.
Failing to Remove Dust
Sanding dust left on the timber surface can interfere with coating performance and create imperfections in the finish.
Always vacuum and wipe surfaces thoroughly before applying oils, stains, or paints.
Ignoring Manufacturer Recommendations
Different timber species and coating systems have unique preparation requirements. Always consult the product technical data sheet and follow the manufacturer's sanding recommendations.
Recommended Sanding Grits for Timber Finishing
Best Grit for Wood Oil
- Final sanding: 120–180 grit
- Promotes deep penetration and natural appearance
Best Grit for Wood Stain
- Final sanding: 120–150 grit
- Encourages even stain absorption and colour consistency
Best Grit for Paint Preparation
- Final sanding: 120–180 grit
- Provides excellent primer and paint adhesion
Best Grit for Varnish and Clear Finishes
- Final sanding: 180–220 grit
- Creates a smooth surface while maintaining coating performance
Professional Timber Preparation Tips
For the best results when sanding timber before applying wood oils, stains, or paints:
- Sand with the grain whenever possible.
- Progress through grit levels gradually.
- Remove all dust before coating.
- Use quality abrasives designed for woodworking.
- Inspect surfaces under good lighting.
- Follow coating manufacturer specifications.
- Avoid over-sanding hardwoods before applying penetrating finishes.
Final Thoughts
Choosing the correct sanding grit is one of the most important steps in timber preparation. Proper sanding improves oil penetration, stain absorption, paint adhesion, and the overall appearance of the finished surface.
Whether you're restoring decking, coating cladding, finishing furniture, or preparing interior joinery, selecting the right grit can make the difference between an average finish and a professional-grade result.
By understanding how sanding grit affects timber coatings, you can maximise both the beauty and durability of your wood finishing projects while ensuring your chosen oil, stain, varnish, or paint performs exactly as intended.
For the best quality Abrasives in todays Wood Care Market please visit - AG WOODCARE - ABRASIVES
No posts found
Write a review© 2004 - 2026 AG Wood Care Products. Company reg: 04699445. VAT no: 670898682
